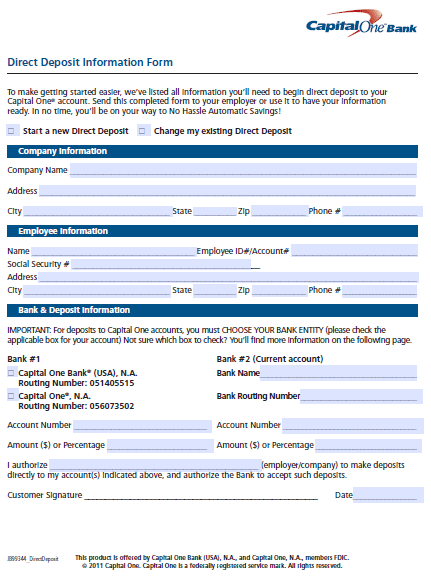
The Capital One 360 direct deposit authorization form is a blank document used to set up instant and direct payments to a customer’s checking or savings account. Capital One has a feature available for their online banking customers; users are able to sign onto their online banking, access their checking account, and select a “pre-filled” direct deposit authorization form. For those of you who are not currently banking online, you can easily take advantage of the convenience of this payment method through the use of the below form and instructions. You will need your bank’s routing number, your account number, and your personal information on hand.
- Capital One 360 Routing Number – 031176110
How to Write
Step 1 – Begin by downloading the form in Adobe PDF and opening it up on your computer. If all goes well, you will be looking at a form which is identical to the one displayed below.
Step 2 – For the purposes of this tutorial, select the “Start a new Direct Deposit” option. If you need to change your information in the future, you can use this form as well and select the second option available at the top of the page. Below the check boxes, enter the following information:
- Company name
- Company address
- Company city, state, zip
- Company phone number

Step 3 – Your information will be required next, providing that you are indeed the employee. Enter in the below information and double check it for correctness before proceeding.
- Name
- Employee ID number/Account number
- Social Security number
- Full address
- Phone number

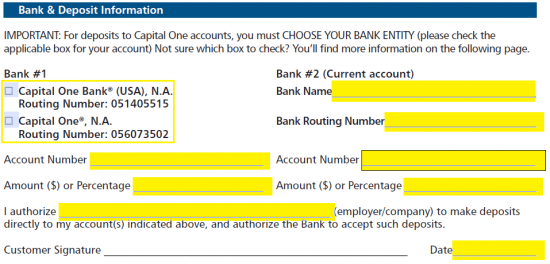
Step 4 – You will now be required to enter the Bank & Deposit information. As included in the disclaimer, for those with Capital One accounts, you will be required to choose your entity under the “Bank #1” heading. The appropriate routing number has been assigned already for each. For Capital One 360 customers, enter the name of the bank under the “Bank #2” heading, followed by the routing number (031176110). You must also enter the account number, and the amount or percentage to be deposited. Finally, the name of your employer and the date can be added before printing off the document.

Step 5 – Sign the completed form and give it to your employer or supervisor for processing.

